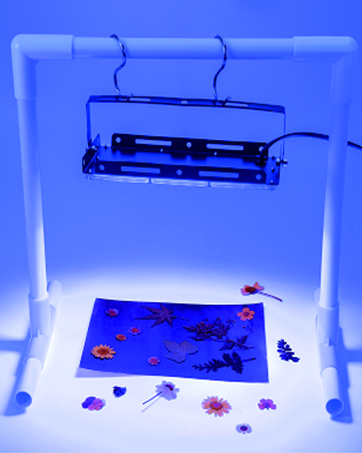
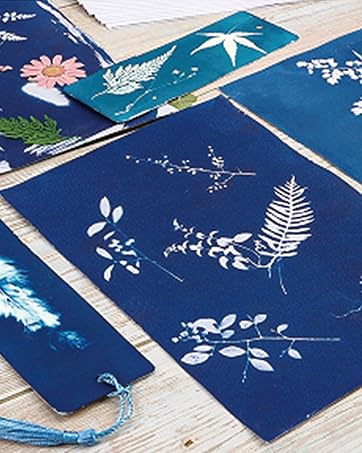
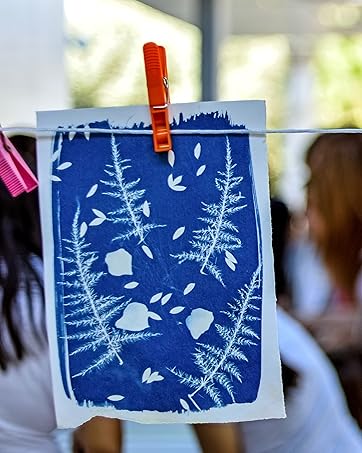
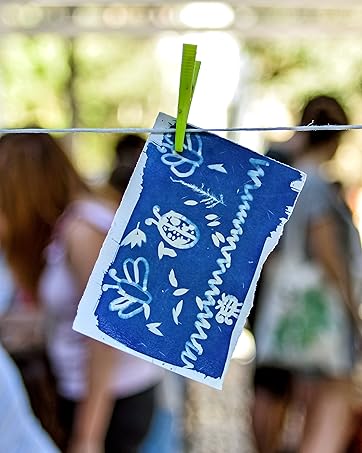
My daughter has been showing a great interest in arts and crafts for the past year or so. I am trying to encourage her with different types of projects so I was excited to request this kit and make some cyanotypes with her. Unfortunately I managed to order this during a spate of bad weather in my region, but I finally got a few hours of clearer skies and did a couple test runs. I’ll start off by saying I’ve never done a cyanotype before, and I used only the instructions and materials included in the kit to make my first two designs. For the most part I think they’ve done well providing everything you’d need to get started. It’s nice that two larger sheets of plastic are included to protect your working surface, and they also provide a couple bibs and two pairs of plastic gloves. I just wore old clothes so I didn’t use the bib. The gloves didn’t work so well: as I pulled one on, my index finger went right through a hole between the index and middle fingers. Once I got it on correctly the space between the index finger and thumb was way too small, to the point where it restricted my movements. Since the other glove felt fine it was obvious the glove itself was the problem. The included watercolor paper takes the cyanotype chemicals and subsequent rinsing very well. You do need to make sure to lay it flat to dry because it keeps its shape as it dries if you lay it on a curved surface. I have not yet tried the bookmarks but can at least say it is a different kind of paper. It feels nice and thick so I think it’s reasonable to assume they can handle getting wet. I found the instructions pretty easy to follow, except they recommended drawing 2ml each of the two chemicals for A4 paper, despite the fact that the kit came with A5 paper (which is smaller). I tried to use slightly less but now that I have two prints made, I’m pretty sure I didn’t add enough. I get the impression you should be pretty generous with the chemicals, and I definitely need to work on my technique to spread them evenly on the paper since both of my finished prints have some uneven areas. The instructions specified that you should let the paper dry before you set it up. I noticed some condensation both times I made prints; I may have been a little too impatient since I was worried I’d get rained out at any time. Luckily the condensation didn’t seem to affect the final output. When the time came to put the paper inside one of the plastic pouches, I found that one was defective. Somehow the two sheets had bonded near the base of the pouch. I slid my hand inside to see if I could separate them, but ultimately the plastic just tore around the bonded area. I had no choice but to throw that one out, but I guess at least the other sleeve still worked. I found it a little difficult to place everything since once I put one thing inside the pouch, when I had to open it to put in the next thing the first item would shift. It also means if you want your items to go off the page you can only do so on one side. Another issue I had with both of the prints I made: it’s seemingly impossible to get the plastic to lay perfectly flat. Even though the gap was tiny, it had a noticeable impact on the final result. On my first print I used fresh plants, so I thought maybe they just hadn’t been flat enough. However, on my second print I used plants that had been dried and pressed flat. It was evident that the tiny bit of space left by the plastic sleeve was the issue because the pressed plants got stuck to it via static cling. I think in the future I’d like to try to find a sheet of clear plastic, or maybe even a clear cutting board or my glass casserole dish—something with a bit of weight to it that will be more able to keep things pressed down in place. I think it will also be easier just to lay everything down and then put something on top rather than having to fuss with placement inside the pouch. Despite the defective gloves and pouch, most of the items included in this kit worked well and I was able to use only the instructions included to complete two test prints. I will likely do a little more research now that I’ve had a chance to try it, in the hope that I’ll come across some tips for how to spread the chemicals evenly on the paper. The upshot is that I’m excited to do this activity with my daughter, and I’m glad I tested it on my own first to iron out the technique a bit.