![[Gulfcoast Robotics] All Metal Hotend Conversion Kit - Polished Titanium Heatbreak for Creality Ender 3 Pro and V2, Ender 5 Pro and Plus and CR10 3D Printers](https://m.media-amazon.com/images/I/41Pxw9aASWL.jpg)


🔥 Elevate your 3D printing game with titanium precision!
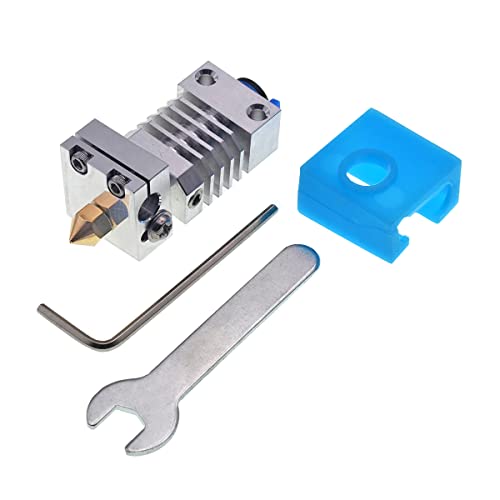
The Gulfcoast Robotics All Metal Hotend Conversion Kit is a premium, drop-in upgrade for popular Creality 3D printers. Featuring a polished titanium heatbreak, it drastically reduces heat creep and clogs, enabling reliable printing at lower temperatures. The included silicone sock enhances thermal stability and speeds up heat-up times. Compatible with a wide range of Ender and CR10 models, this kit offers an easy installation with no modifications required, making it the go-to upgrade for millennial makers seeking flawless, high-temp prints and consistent performance.
| ASIN | B0811NWV2F |
| Best Sellers Rank | #493,986 in Industrial & Scientific ( See Top 100 in Industrial & Scientific ) #7,985 in 3D Printer Accessories |
| Date First Available | November 5, 2019 |
| Is Discontinued By Manufacturer | No |
| Item Weight | 5 ounces |
| Item model number | CR_HQ_HE_BRASS |
| Manufacturer | Gulfcoast Robotics |
| Product Dimensions | 2.01 x 0.79 x 0.79 inches |
B**T
Amazing Results, night and day difference to my stock Ender 3 hot end
Prior to getting this hot end, I was struggling with printing PETG and having it stick to my bed. After the first 2 good prints, I couldn't get another reliable print from that spool to save my life, and it was very frustrating. Whether it was not sticking to the bed, excessive stringing, not extruding enough, or a slew of other issues I was having, it was just being difficult. Finally, I was able to get that print to stick (on the stock hot end), but I had to be at 235C in order to do it! I took a look at my PTFE tube and it was charred and breaking down at that temp. SO I ordered this kit and was very impressed. Build quality is good. No instructions came with it, but their support team responded to an email without a few hours with a detailed guide and answered all my questions. (Installation is very straightforward, but I'm glad I asked the questions I did because I didn't know about the Heat to 250C then tighten the nozzle). My first print with the same material I was having issues with printed just about perfect. There was still minor stringing issues, but that can be dialed in with settings. What really shocked me is that this material, which the old hot end needed to be at 235C in order for a possibly-ok print printed fantastic at 215C! thats a whopping 20C lower, the stock hot-end would barely extrude properly at that temp. I'm curious how this compares to the TH3D titanium all-metal conversion, which just replaces the heat break on the stock hot end. I had that as well in case I didn't like this, but am so satisfied with this product I think I'll save the other one as a spare / if I decide to go to a dual-hot end setup.
C**K
I am incredibly impressed! easy install, fantastic quality!
While I wish they included paper instructions, the bag that the hotend was in had a qr code on and when I scanned it, it took me to the website where they had excellent detailed step-by-step instructions with lots of pictures that very thoughtfully and verbosely explain the very easy installation procedure. moreover, despite having them already, the hotend upgrade kit includes all the tools you need to install it. everything goes together exactly like the stock hotend except the hotend and heat brake are separate pieces that come apart with a grub screw and because it's actually all-metal, the ptfe tube doesn't go into the heat brake, just into the coupler where it meets the top of the assembly so you have a little more sticking out of the top. you can either trim your ptfe tube (recommended as the end is probably fried anyway if you've been printing with it on the stock hotend for some time), or let the excess hang there. for the price (which is honestly fantastic!) this is a great upgrade to be able to print higher temp materials without frying your ptfe tube (like abs for example which is why I bought it). I'm going to be using my ender 3 with a cardboard box enclosure to print the parts required to construct a voron 2.4 soon. following the instruction guide online, they recommend reducing retractions in half to 3.5mm and after making that slicer correction, I get honestly FANTASTIC PLA prints. (I haven't bought my abs yet, but if this prints as good with abs as it does PLA, I'm REALLY happy with this. I will very likely be buying another one of these for my tevo torando (which is a cr-10 clone and has identical mounts and cooling configuration as the ender 3). I would recommend that this company start including the web instructions on paper with their stuff for people who don't want to have to refer to the internet via computer or phone for installation or don't know how qr codes work (I see some other reviews stating that this doesn't come with instructions and i think they totally missed the qr thing (which isn't nearly as huge in the US as it is in other countries), but I can easily give this product a 10/10 review and as I said, will likely be buying another one just like it for my tornado. oh, and in case anyone is wondering, it uses the standard mk8 hotend design so it accepts the same nozzles as the stock hotend (so if you have a bunch already they'll work)
B**D
Works Nice and Cheaper than The Big-Name
This works nice and I am happy with it. I originally installed per instructions (at least I thought I did). After a few nice prints it started to leak. This only caused issues with PETG where a blob would build on the side of the nozzle, brown up, and then drop on the print. This lead to either a random brown blob on my print or a collision and layer shift. So... I took apart and cleaned/polished the heater block and heat break with a heat gun, wire bush, and file. Then I put the block and break back together, using a heat gun to get em hot and tightened up good. Then added a new nozzle, heated it all up and tightened good. Been running perfect since. Im saying to make extra sure that the break is tightened into the block with heat and then the nozzle into the block so it is all tight and there is no way anything can ooze past those threads.
Trustpilot
2 days ago
4 days ago