

Desertcart purchases this item on your behalf and handles shipping, customs, and support to Italy.
🛡️ Protect your ride’s shine with aerospace-grade clarity!
The 3M 8 Mil Headlight Protection Film Kit offers 20% greater thickness than industry standards, ensuring robust abrasion resistance. Featuring the clearest optical film and a non-yellowing tri-laminate construction, it maintains headlight clarity while providing 550% flexible elongation for easy, precise installation. Manufactured by 3M Aerospace, this kit includes two 15x30 inch sheets designed to fit most popular headlight sizes, delivering premium protection and long-lasting performance.
| Asin | B07D4QXLNN |
| Best Sellers Rank | #155,822 in Automotive (See Top 100 in Automotive) #94 in Protective Shields #24,032 in Automotive Exterior Accessories |
| Brand Name | ClearMask |
| Color | Clear |
| Customer Reviews | 4.3 4.3 out of 5 stars (191) 4.3 out of 5 stars |
| Installation Type | Peel & Stick |
| Item Dimensions L X W | 30"L x 15"W |
| Manufacturer | ClearMask Protective Films |
| Manufacturer Part Number | CM4 |
| Material Type | Polyester |
| Model Number | 5 |
| Number Of Items | 2 |
| Size | 15 x 30 inches |
| Ultraviolet Light Protection | False |
| Unit Count | 2 Count |
User
Works Great, but only if you read and follow directions and dont get in a hurry.
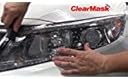
I bought this because I drive Old cars and trucks. My 03 Silverado 2500 HD got a new set of lights, so it was a perfect time to add additional UV protection. The aftermarket headlights that you get these days don’t hold up as well as the originals. If you are applying to old lights, be sure to polish them first and get all the foreign matter off the surface. I did the old lights on my SAAB 9-5, they needed a lot of help and they also turned out great. The most important thing you can do is read and follow the directions, work slow, and use the materials and methods in the instructions. I made my own patterns and carefully fit the film to made sure the lights were covered, but that there was no material overhanging the edges. Did I mention, read and follow the directions. This material has a lot of stretch to it, but is also will distort easily when stretched. When using the squeegee, you need to avoid using a lot of excess pressure, slow, steady and gentle is the key. Make sure to get all the liquid out from under the film. None of my cars or trucks have those headlights with a bunch of crazy compound curves, so I had that going in my favor. I am very pleased, now all I have to do is get my Wife’s HONDA ACCORD headlights coated. 2 sheets did all three vehicles. This stuff is not too thick, not too thin, just right! Super clear and no distortion that I can see, appearance is great. It really sticks well, once you squeegee out the water/soap mixture. No bubbles if you follow the directions and take your time, be patient!
User
The solution to improperly used plastic is this properly applied plastic!
To start with let’s all agree plastic headlights suck! That said, I just finished wrapping the headlights on my 97 Civic which are curved and have a seam between headlight and turn signal. Took my time and followed directions-in fact I read them start-to-finish three times-and at least so far they look beautiful! I’m impressed with the quality of the wrap, it should last several years. If I were keeping the car I would apply two layers but as it is going to be sold I just used one but I did leave a tab at the top so the owner can just peel it off in the future easily if it gets cloudy. I have a few small spots around the assembly edges that I am sure will lay down and adhere tomorrow-they aren’t on the lens, just on the flat part around the light reflector, out of view once assembled and protected from car washes etc. that might cause edges to lift. Actually I’m so impressed I may just buy new lenses for my Volvo 245SE and another set of these. Mine are cloudy as heck and new plastic costs 1/3 what glass lenses do so even adding this cost makes it more economical. And I don’t drive a 30 year old car because I’m a car nut(although I am) but because I’m a cheapskate! This old Volvo is one of the most dependable, least expensive to maintain and safest cars on the road, It has 400,000+ miles and engine and transmission have never required repair. I drive around 475 miles round trip to the VA hospital and average 85MPH and 28MPG when roads are clear-3 passes twixt here and there. On the other hand I am beginning to like this Honda and I was a Honda factory tech before I retired so I am certain this one has another 200,000 miles in her before major before she dies, at least!
User
Thick film, hard to curve and cut with blade
Film is thick and strong and clear, perhaps a little too thick for easy maneuverability and application, or perhaps just due to my inexperience.I refinished oxidized headlights on a car and applied this film to the end product. These headlights had some curves to them, and despite using a heat gun to help stretch the film over curved surfaces, I had great difficulty.The film has been on the outdoor-parked car for slightly over a year now and seems to be holding up well. There’s a little bit of rainbow stretch distortions if you look at the headlight directly when they are on. This may be due to how much I had to stretch the product or my own heat application.
User
Easy enough
Some reviewers have posted detailed experiences which I found helpful. I would like to add some tips for after after you read and reread the directions.There is one more tool I found extremely helpful: a burnisher. Mine is a small chunk of ebony about a quarter inch thick with rounded corners on flat and curved edges. Anything hard with very smooth edges will work. There’s probably something in your kitchen utensils you can use.The instructions say not to install in direct sunlight. That’s probably true, however, I installed the second side in the late afternoon and the headlight was quite warm. It was ten times easier than the one I did earlier under cloud cover. I used a lot soapy water and made sure it wasn’t drying up before I started to peel the backing.The instructions say to keep your hands and the film backing dry. Not true. I sprayed everything. It washes away any dust or particles that were attracted by staric.When you cut your piece, give yourself a good inch. Clean the car well and you can use the car to help hold the piece while you figure out where to stretch and shape the film for a clean fit.When making your template or drawing your lines, do leave extra on the “other side” of the hump. The flattest part is easier to trim close, but as you stretch around the most convex parts, it will change where the line is.I used an xacto blade to trim the film after it was installed. It was a bit squirrely before the film had time to cure in place. Give it a few hours before you try to trim close to the light.
User
Not specifically made for headlights.
This is a clear protective film, but not specifically for headlights. The instructions tell how to install on door or hood edges to protect the paint. Nothing about headlights. It works, but you have to cut them to shape yourself (a given of course since it's not made for a specific vehicle so not a negative) and we'll see how well the adhesive holds up to the heat given off by headlights (on vehicles with LED headlights it won't be as much of a worry).
User
Excellent Thickness 3M Brand Film
The product was exactly as described, a thicker 12mil 3M brand film, LLumar. I used it to protect my glass headlight lenses and it was very easy to install once I got the hang of it. The film is very durable but doesn’t appear to be very stretchy, although if you applied heat I bet it would be better. It comes with instructions and tips and tricks as well which was unexpected. Be sure to read them thoroughly and mix up a good slip solution as directed.I have yet to drive the vehicle but the intent was to prevent rock chips from breaking the glass headlight lenses. Hoping this will do the trick
User
Feels like it should be good protection
I applied this to two new headlights, I didn't want to have any pitting or yellowing. I was a little hesitant to try it because I have very little patience. I tried the first one out with the headlight on a bench and I used warm soapy water and a little heat gun and it wasn't too bad. It came out pretty smooth I didn't have any bubbles but heat will be your friend. The second one I tried with it on the car and it didn't come out as well as the other one. I was trying to stretch it and there's little marks on the film which you'll notice if you look close. If I had to do it again I would definitely take the one out of the car, it was easier for me to get around the corners. Try to use some heat and a lot of soapy water and have patience.Update April 2025Headlights still look brand new, there's not even a hint of yellow or any pitting, looks like I just put it on.
User
Buy only if your headlights are flat
Do not buy this if your headlights’ surface are not flat.How about this product and I tried to apply it on my 2014 Honda Accord headlights, it turns out my headlights are not completely flat, they have a weird shape, so he’s not possible to put the film unless it was pre trimmed specially for your model
Trustpilot
1 month ago
1 week ago