Desertcart purchases this item on your behalf and handles shipping, customs, and support to Italy.
🖤 Level up your Switch’s style and grip—because ordinary is overrated.
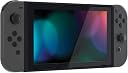
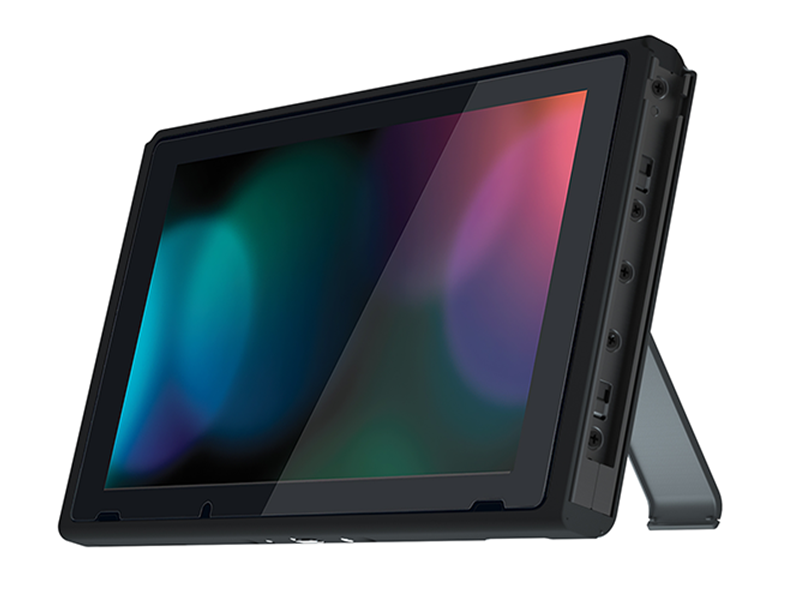
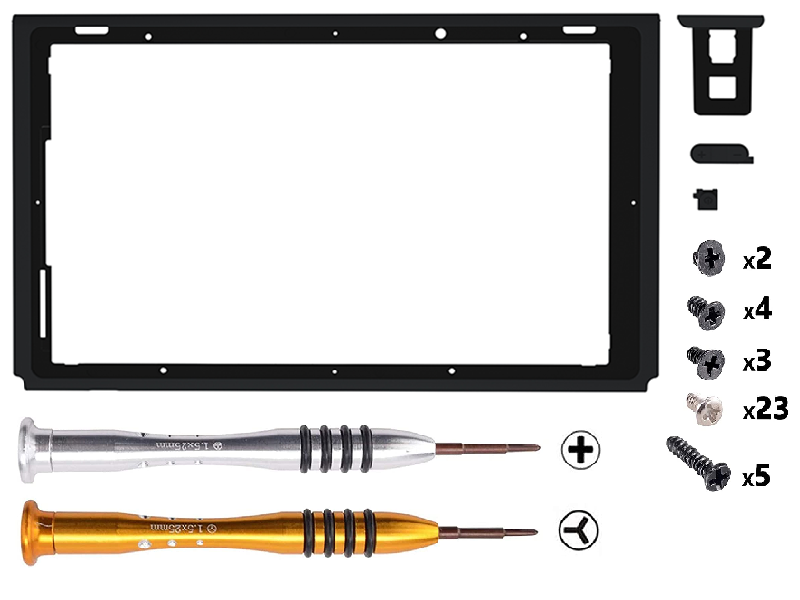
The eXtremeRate Black DIY Housing Shell is a precision-engineered replacement front cover for the Nintendo Switch console, featuring a sleek matte black finish with anti-slip, sweat-resistant texture. Designed for experienced DIYers, it includes volume and power buttons, a game card tray, and essential screwdrivers for a professional-grade installation. Transform your Switch with a unique, stylish upgrade that enhances both aesthetics and grip.


| Asin | B08N5TV9HF |
| Best Sellers Rank | #9,889 in Video Games (See Top 100 in Video Games) #35 in Nintendo Switch Skin & Protector Sets |
| Brand | eXtremeRate |
| Color | Black |
| Customer Reviews | 4.5 4.5 out of 5 stars (690) 4.5 out of 5 stars |
| Enclosure Material | Acrylonitrile Butadiene Styrene (ABS) |
| Finish | Matte |
| Hardware Platform | Nintendo Switch |
| Item Weight | 30 g |
| Manufacturer | Extremerate |
| Mfr Part Number | VEP310 |
| Model Number | VEP310 |
| Number Of Items | 1 |
| Unit Count | 1 Count |
User
Looks completely brand new now
If you want a clean, premium look, this white shell is perfect. The plastic feels durable and smooth, matching the original hardware quality. Installation takes a little patience, but everything lines up exactly as it should. It completely refreshed my device!
User
Incredible product and instructional video
This was my first time taking the console apart and I was intimidated. I spilled acetone on my Switch years ago and I finally got the courage to replace the housing. The installation video is awesome. I only had to go to Reddit once because one of the screws on the motherboard was glued in. Play by play, tips, and good tools. The suction cup could have been a bit stronger though. If you’ve never done this before, watch the video first and then work alongside it. You’ll be glad you did! This thing looks so sharp now. Just remember to double check your connections before closing up and don’t force anything. I ended up getting joycon shells and a soft touch back plate since they didn’t have the full Damascus set. Still very pleased. Never going to anyone else. Thank you!
User
Great for Budget Customization
I buy a fair amount of eXtremeRate products. I like to customize my controllers. These are high quality and perfectly compatible. The tools they send will work and I’ve used them before, but I do tend to use my own tools. Color consistency is amazing, I have matched multiple consoles for my girlfriend. If you work on electronics, these are super easy to install, if you are a beginner, watch the videos and make sure you have a clean and clear workspace.
User
Words of Warning
Overall the product is great, its well constructed and the video is easy to follow along, BUT a lot goes into it that could go wrong and in my case it did. Below I will list everything learned along the way as either an aid or a warning. If this is your first ever attempt at taking apart any computer systems I urge you to tread with caution before attempting this especially if you're attached to your switch.- The screws by your joycons have locktight or a similar product on them which makes removal almost impossible. the provided screwdrivers also have a tendency to strip them. In my case screws got stripped and I had to try multiple tools and methods to get them out. I recommend investing in a good set of small screwdrivers and using them for this whole process instead of the included ones.- I saw in another review or maybe comment on YouTube to take pictures of every step along the way so you have a reference when putting your switch back together. I would absolutely recommend it, being able to reference how it came out of the factory was incredibly helpful when the video got slightly confusing.- Getting the screen off is NOT as easy as it seems. Heat gun or hair dryer did not help. After spending about an hour attempting to get the screen off this is where I threw in the towel and decided a fully customized switch is not worth it.- Your screen may stop working. Going back to the stripped screws, I got halfway into installation and had to pause everything because I couldn't get important screws out. I closed the Switch back up completely and waited until I was able to get the stuck screw out before continuing. At this point my screen had began flickering on and off when playing. Assuming it was a loose wire or two I persevered, once getting the stuck screw out I began the process again. As said above after giving up on pulling the screen off I once again skipped ahead in the installation video and closed the switch back up. At this point it no longer would turn on.- Good news! Nintendo repairs are cheaper than a new console. After quite a bit of research I have found that Nintendo will repair your switch, even out of warranty for about $100. While I have just mailed my switch in and am waiting for it tp be repaired and returned, I have high hopes. I will update with hopefully a fixed, and basic colored switch.
User
Great product but tough installation
The product looks and feels nice and includes a suction cup, both screwdriver heads and some backup screws.That being said, this mod requires a complete tear down of your switch. There is a very helpful YouTube guide made by the company, but I wouldn’t recommend it for anybody who doesn’t have moderate experience with working on electronics. The tools provided work, but I don’t love them. Much better to use your own kit from ifixit or whoever you prefer.Also, as stated before, some switches (mine included) have insane torque on on of the rail screws. It will literally strip your screwdriver before budging. But otherwise, it looks nice and it’s a fun project.
User
Very good
Very nice easy to install took me like 30 minutes don’t believe the ai it’s not hard to install unless you don’t have experience I installed it without a guide love the colors too and the material it’s not very expensive you if your going to customize your switch get this one
User
Don't do it unless you have experience working on electronics
This one is on the extreme side of DIY , the instructions video is 1h long and you need a heat gun to heat up the glue underneath the screen to remove it and it doesn't come with new double sided tape to secure the screen so you have to reuse the old one where you going to have some corners lifting due to weak glue.
User
Works great
This front housing works great. It fits well, I believe that the back housing cover that I installed doesn't work well with this but I don't blame the front housing. The black color looks nicer than the original & it feels nice on the hands.
User
Great quality to customize your switch
ExtremeRate always has the highest quality of accessories for the switch and I wasn’t disappointed this time either! Makes my switch look very fancy and my friends have asked me where I got it from. Would buy again!
User
High quality mod-job kit!
The switch is passing down from our 13.5 year old boy to our 4.5 year old girl for Xmas. He didn’t look after it too well and had a lot of scratches and his left joy con was drifting, the joy cons also weren’t securing to the switch as strong as they used to. Came across ExtremeRate products on Amazon and realised I would be able to do a complete re-shelling and fix up of the console to make it more girly too.I have little to no experience when it comes to things like this but I have never been too afraid to open things up and give things a try.First of all, I replaced the drifting joy stick, then I swapped out the plastic clips for metal ones before starting on re-shelling the joy cons themselves. It look a little bit of examining and playing about to figure out how it comes apart and goes back together, but it was not overly complex.Then came the big job, the console itself. The new case came with a back shell but no front so I opted for white front shell to contrast the rear shell and compliment some of the white features of the new shell. I initially took apart the entire console, bit for bit, mapping out the screws as I went along. I ensured I was meticulous and slow. After doing that I realised that I could have just separated the digitiser screen from the front shell to expose the screws and not dismantle it all.I made I few little mistakes putting it back together, nothing too worrying, so ended up closing and re-opening the console a few times but after some persistence and care I got there.The trickiest part was removing the digitiser, it’s pretty well stuck down and I also didn’t use heat to soften it up but I was gentle and careful.I think the end results speak for itself. It looks amazing and has added a whole new life to a 4 year old console. The warranty is long gone so there was no risk of losing that anyway. The replacement parts are all high quality, even down to the tiniest of screws.I have now ordered some Thermal Grizzly Kryonaut to top up the thermal paste on the heat sink (as it was starting to look a little dried up) just to be sure and keep the console as cool as possible, so one more open up and job done in time for Xmas.Would highly recommend these products! If I can do it, you can too.
User
Hermoso pero debes tener cuidado
El producto como siempre, bien empaquetado, ordenados y listo para ensamblar. PERO no lo recomiendo si tienes poca paciencia o no tienes experiencia en arme y desarme de electrónicos.Cometí un error y terminé dañando la pantalla y el digitalizador por querer hacer el cambio de carcasa, tuve que pedir otro y la sufrí, aprendí? Definitivamente, pero si no tienes recursos para poder comprar un respuesto como yo... Recomiendo que vean el tutorial muchas veces y tengan paciencia, se necesita una pistola de calor y tiempo para despegar la pantalla y si apresuras las cosas les va a ir mal.Fuera de eso valió la pena, ahora mi consola se ver hermosa y todo funciona a la perfección.
User
Qualità prezzo buono
Prodotto di buona qualità
User
El bisel es de buena calidad, pero no es un proyecto para principiantes.
Encaje y acabados perfectos, pero proyecto de MUY alta dificultad. Piénsatelo 3 veces antes de pensar en cambiar el bisel. Necesitarás cinta adhesiva de boble cara especial (3M 300SLE 2-3mm ancho) y casi directamente poner pantalla, sello pantalla y digitalizador nuevo.
Trustpilot
1 month ago
2 months ago