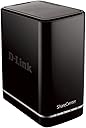
💼 Elevate your digital workspace with secure, seamless storage that keeps you ahead of the curve.
The D-Link ShareCenter DNS-320L is a 2-bay diskless network attached storage device designed for professionals seeking affordable, expandable, and secure cloud storage. Featuring a faster processor, four RAID configurations, and an intuitive web interface, it enables effortless file sharing and remote streaming across multiple devices. Its quiet cooling system and mobile app integration make it a reliable hub for managing and protecting your data anytime, anywhere.
| ASIN | B008HNRD4I |
| Brand | D-Link |
| Color | Black |
| Compatible Devices | Desktop, Tablet |
| Customer Reviews | 3.9 out of 5 stars 1,254 Reviews |
| Enclosure Material | Metal |
| Global Trade Identification Number | 00790069375743, 05054531948909 |
| Is Assembly Required | No |
| Item Part Number | DNS-320L, DNS320L |
| Item Weight | 113 Grams |
| Manufacturer | D-Link Systems |
| Material | Metal |
| Mfr Part Number | DNS-320L |
| Model Number | DNS-320L |
| Mounting Type | Tabletop |
| UPC | 790069380419 790069340451 013088355009 790069375743 112840324533 809199906458 |
R**I
Great, inexpensive way to increase storage capacity!
I already had 3 of these Storage bays. Each one has two 3tb Seagate Barracuda drives. Very happy with the setup and, at this time, do not really have a storage issue. A few weeks ago, I installed a new ASUS router, also from Amazon, and it crossed my mind that these bay storage systems were getting more expensive all the time and, if one of my bays went down, I would not have a backup. So, I started searching around for an additional unit. There is one other reliable supplier that has this at the same price. However, I prefer Amazon. Let me warn you, if you want to find this unit from Amazon ($99.99 on Prime), you have to use the following search . . . "D-Link ShareCenter Cloud Storage 2000 2-Bay (Diskless) Network Attached Storage (DNS-320L)". If you search any other way, all you will find are used units for the same or more money. Since I had two new Seagate Barracuda 4tb drives I decided I would get the ShareCenter from Amazon and add that mix to my system. When I installed my current units, I had to download a patch from D-Link so that Windows could recognize a 3tb drive. I also had to use the Disk Manager to format and configure the drives. So, after I installed the 4tb drives in this unit, I was very pleased that the D-Link Installation app was easy to use, formatted the drives and installed them in windows in a matter of minutes. For the price, I do not believe you can beat this ShareCenter. If you want more than a two drive setup, the price of the bay units escalates very fast. If you want a four drive system, using two of these is less expensive than most four bay units. Also, I feel that it gives you more flexibility and security. If all your drives are in one unit and it goes down, what do you do? Therefore, I prefer to have redundant units rather than one big box. The units have a built-in fan to keep them cool. They can be attached directly to your PC or to your router for a neat network I would recommend these units to anyone looking a reliable, easy to use, inexpensive way to increase the storage capacity of their network (system).
J**B
First blush: Hardware great, setup not so much
The D-Link DNS-320L is an upgrade of the DNS-320. It has a faster processor on board and design changes to the box. I've just had it a few days and it seems to function fine. The on-board fan has high and low speeds and defaults to off/low/high so it runs quietly most of the time (although the low speed fan isn't loud) when it is backing up, but sleeps when not in use. I am a Mac user so it is important to note that this device works fine with Time Machine. It mounts when it is time to back up and unmounts afterwards. I am running OSX Lion (10.7.5) and it is important to note that the Set Up Wizard that comes on the CD is flawed. DO NOT USE IT! Once you get the DNS-320L plugged in to your network, go to it via the Web interface. There is a set up wizard in the Web GUI that will help with the basic setup, and then you can go Management-Disk Management and set up your Hard Drive Configuration (which will format the drive(s)), then go over to Applications-Local Backups-Time Machine where you can enable Time Machine (which starts the AFP service) and then add individual shares under Settings for each machine you want to back up. I also recommend creating a user for the back up connections because if you try to connect to the NAS with the admin password, Time Machine will ask you to change it. Not the case with a mere user. The problem with the Set Up Wizard failure is that it apparently is the only way you can set up an account with mydlink.com, which is how you can connect to the NAS from your smart phone or tablet (iPhone and iPad in my case). My desire to do this led to a great deal of aggravation because when it fails, it corrupts your password and configuration, and I had to reformat the drive (losing backups that took a long time to do, about 3.25 hrs. for 156 gigs). I've filed a support ticket and hope this gets resolved soon. Meanwhile, if you are a Mac user, some features of the DNS-320L will not be available to you. Bottom Line: Incremental backups are quick and automatic for my little Mac server and iMac. That's what I wanted. The set up and personal cloud functions are up in the air for now.
W**H
Not what I was hoping
The hardware is very good and it read the hd's I installed with no problem. But, the software is very basic and the backup software is horrible. I bought it for the RAID configuration for security for home use. I wish I had spent the money on something else with real software.
K**B
Works like a charm
After a few years I've racked up 4 external drives that I need to keep switching just to access my files. I purchased this as a centralized storage solution and I'm very impressed with it. I'd recommend it to anyone that's looking for a reasonably priced network storage solution for their home. I have a background in IT so the setup was pretty simple, took me about an hour all things considered. But the setup disk is really straightforward, you can't go wrong. I was able to drop the hard drives quickly (although it took more force than I expected), plug it into my router and setup a couple users for access permissions in no time. The configuration interface runs through a browser and it's super quick. It took about an hour to format the drives (6TB in all). There are a lot of options for configuring with Macs and PCs. I also use it to wirelessly backup my Macbook Pro with Time Machine. It's so seemless I never really know when it's doing the backup until I see the icon change. So far haven't run into any issues, not even after I upgraded to Lion. I've had it for almost 3 weeks and not a single issue. Definitely worth the purchase. FYI you can set up alerts to be mailed to you if anything goes wrong with the device, nice feature among others.
M**S
I Wouldn't Count On One For My Important Data
I'm a software developer and have been around the industry for well over 30 years. I had recently been using portable USB drives for backups but wanted to get something a bit easier to deal with so after a bit of research I picked the DNS-320L. Amazon got me the device rather quickly, as expected. I opened the box to find the quality of the product about what I had expected for the price, nothing heavy duty but looked good for home use. I wanted a RAID 1 configuration and D-Link never specified if hard drives needed to be the same or not so to be safe I wanted to get 2 of the same hard drive types. I had ordered a single drive at the same time, it shipped separetley so there was no more I could do until my first drive came. Finally got my drive, installed it into the DNS-320L, I run the wizard that came on the DVD and it does not see the device. I go to D-Link support site and was shocked to find support only consisted of a handful of FAQs and an email option. The FAQs where useless so I fired off an email while there. I read some more of the manual and learned some other stuff so I looked on my router and see the 320L has obtained a DHCP lease, I was able to go directly to the 320L web interface and set it up manually. D-Link does not give any direction on what you need to do for manual intial config but I finally got the NAS up and running but noted some security errors in the log. I found the web interface to be odd especially dialogs that confirm things. I went ahead and ordered my second drive at this point. A couple days later I get a reply from D-Link that just says to download the install wizard from the web site. The downloaded version worked, that would have been a nice FAQ to have. I hadn't discovered any issues with security and since I am still waiting on my other drive I decided to go ahead and run the install wizard. After running it the drive had to be formatted again and now see the security log entries have gone away. I got my second drive, shutdown the NAS and installed, powered back up and the NAS doesn't see the drive. After some more investigation I re-seated the drive and the NAs detected it. I was then able to use the extremely poor interface to configure the NAS to RAID 1. The NAS said it was going to format the drives, after a long, long wait it says its done. I noted it said the Volume was degraded on a status screen and I also noted I still had the data on the drive. This would make sense with adding a drive to a RAID 1 config but D-Link didn't tell me this. I next tried using my printer on the USB port so I plugged it in. I see the printer in the NAS interface and can connect to it from the network and even print to it without errors anywhere but nothing ever prints. The log has no entries and the website has no info again. After a NAS reboot it says it detected a new drive and wants to configure it so I tried again. I'm now in a never ending cycle of degraded drive followed by newly detected drive after reboot. I thought maybe the second drive I added was bad so installed it by itself in both bays and it works fine. During the many hour process of testing and configuring the NAS, it's interface would stop responding become sluggish and contradictory. After many hours I gave up, due to D-Link lack of site support and multiday email response I've decided to return the DNS-320L and go with another manufacturer. I did not attempt to contact support via phone, I don't want a product that is supported online as poorly as this. UPDATE 12/31/2013 Return went very smooth, Amazon made that as painless as possible, just print label and drop off at UPS store no charge to me....still must wait to see if my credit card is adjusted. In the meantime I just got my 'replacement',a Synology DS213J. Out of the box it seems to be a step up in build quality. I was up in running in 15 minutes, the software interface is leaps ahead of D-Link.
R**R
DO NOT TRUST
Works fine as network file server. However beware of the D-Link raid-1 mirror backup. One of my (WD) disks failed after 33 months. The owners manual was unclear about restoring files. So I called D-Link tech support. She told me to (EXT4) format a fresh disk and then install it next to the good drive. That caused the good disk to become unreadable by the server. The tech insisted the D-link server had not touched the disk: it had failed on its own. Obviously not true! A quick search of D-Link FAQ revealed a warning to NEVER install a formatted disk with an existing raid-1 disk. My conclusion is that you should not trust D-Link Tech Support with your data. If the tech had read the documentation she would have told me to install an unformatted blank disk next to the remaining raid-1 disk. The server web wizard will correctly detect the situation and offer 2 options: format both disks or format 1 and mirror the other onto it. It took me 2 days to remedy the damage. 1) I installed Ext2Fsd on my Windows System 7. 2) I made an NTFS copy of all of my files -- as a precautionary backup. 3) I installed 2 fresh WD drives in the D-Link ShareCenter as a fresh raid-1 pair. (It would no longer read the only remaining good disk.) 4) I manually copied all of my files from the NTFS copy to the ShareCenter. I assume the raid-1 system now has 2 redundant copies of my files. And finally, 5) I confirmed that the new ShareCenter was synchronized with the NTFS copy: SynchronizeIt. Three lessons: DO NOT TRUST D-Link tech support; read the D-Link FAQ thoroughly before you attempt to restore your files from a mirror copy; and seriously consider using an online backup in addition to the D-Link raid-1 mirror. In Michigan they call that "belt and suspenders insurance."
K**T
Works Great!
I purchased this so that I had access to my working files both at my home office and my "real" office. My goal was to keep all images in one place and access them from either desktop or laptop. I have been using DropBox and a few other similar online cloud storage options. The drawback to using these services is that the files go UP from one computer --- stored on the cloud --- DOWN to the other computer. With large image files, this can take a very long time. I was skeptical with another personal cloud storage option. In the past I tried the Western Digital (My Book Live). It was a horrible product that was very difficult to access. It never worked for me. This D-Link ShareCenter is both fast and reliable. My files are quickly (immediately) accessible from all of my computers. Using this product is a HUGE time-saver and relieves the file organizational issues that I had using online cloud services.
H**S
A reasonable unit with software deficiencies.
The unit names each drive in the order of installation. Cannot change the name of the drive. Internet search has some work-rounds, which as somewhat cumbersome. The unit has to reformat every drive install into it--be careful not to lose your data. The hard drives formatted by the unit can be read independently using an UNIX machine. The included software package work OK. The Surveillance Center works full time (no on-line computer required) but is difficult to setup. The software is automatically loaded onto one of unit disks (selected by the software) and all recordings are hidden from view--they can only be accessed through the Surveillance Center. Internal data transfer is easy to setup with the provided software, but all settings are lost each time the unit is losses power or is powered down. Data transfer rates are very good.
V**.
Nice Product, Excellent as described
Nice Product, Excellent as described. Only think you have to format hard disk before using it. You cannot put the one already date there in HDD.
P**.
Genau was ich gesucht habe
1) Gründe für den Kauf: Da ich in meinem Heimrechner die zwei 1 GB Festplatten ausgetauscht habe, war die Überlegung die beiden jetzt "überflüssigen" Platten in externe Gehäuse zu packen. Bei der Suche nach einer geeignete Möglichkeit, kam mir die Idee einen NAS-Server in mein Hausnetzwerk einzubinden. Meine Erwartungen an das Gerät: Kompatibel mit den beiden Platten von Samsung, SMB Freigaben, Ohne Software (über Web-Interface) zu konfigurieren. Media-Server wäre zwar ganz nett, muss aber nicht sein. Und vor allem ein günstiger Preis. Nach einiger Recherche viel meine Entscheidung auf den NAS-Server 320L. 2) Inbetriebnahme Die gut Sortierte Verpackung enthält alles was man zum Betrieb braucht und auch ein bisschen was man nicht braucht. Netzwerkkabel liegt auch dabei. Allerdings keine Information auf dem Kabel um welche "CAT-Kategorie" es sich handelt. Die CD wird zwar in der Schnellstartanleitung als notwendig angesehen, aber aus meiner vorherigen Suche im Netz wusste ich, dass es auch ohne geht. Oberhalb des Gerätes befindet sich eine Klappe die sich relativ leicht entriegeln und öffnen lässt. Ist diese entfernt gibt sie den Blick in innere frei und man erkennt die beiden SATA-Ports. Für die beiden Festplatten ist jeweils ein Griff im Lieferumfang enthalten, der einfach an die Festplatte geschraubt wird. Übrigens kleiner Tipp: Vor dem Festschrauben einmal gucken, wie rum die Platte eingesetzt werden muss. Die Griffe sind ein wenig schräg, dadurch passen diese nur in eine Richtung ins Gehäuse. Ist der Griff falsch herum angebracht muss dieser nochmal entfernt und gedreht werden. Sonst geht der Deckel nicht drauf. Nach dem einsetzen der Platten habe ich das ganze an den Switch und ans Stromnetz angeschlossen und gewartet, bis die Status-LED aufgehört hat zu blinken. Kurz im Router nachgeschaut, welche IP-Adresse dem Gerät zugewiesen wurde und per Browser aufgerufen. Und siehe da, direkt wird die Eingangsseite zur Konfigurationsoberfläche angezeigt. Im Vorfeld während des Wartens auf das Hochfahren des Gerätes habe ich mir bereits auf der D-Link Internetseite die aktuelle Firmware und die deutsche Sprachdatei runtergeladen. Beides habe ich dann auch direkt aufgespielt. Der NAS Server muss für beides einmal neustarten. Im nächsten Step habe ich dann die Festplatten konfiguriert. Wichtig an dieser Stelle ist übrigens, dass die Platten formatiert werden bevor man diese nutzen kann. Dabei werden alle Daten auf den Platten gelöscht. Wer wichtige Daten hat, sollte diese vorher sichern. Es besteht die Möglichkeit ein Raid 0, Raid 1 oder beide Platten als einzelne Laufwerke einzubinden. Ich habe mich bei der Einrichtung für ein Raid 0 entschieden, da auf den Platten keine "kritischen" Daten drauf sind. Und es nicht sonderlich ärgerlich wäre, wenn diese verloren gehen. Außerdem wollte ich gerne nur ein Netzwerkordner in Windows einbinden müssen, in dem alle Daten drin liegen. Die Formatierung hat ein wenig gedauert, aber es hat alles einwandfrei funktioniert. Anschließend habe ich noch einen Namen für den NAS-Server vergeben um diesen immer einfach auf anderen Rechnern als Laufwerk einbinden zu können. In Windows dann einfach im Windows-Explorer "\\NAME-DES-NAS\" eingegeben und schon wird das angelegte Raid 0 als Ordner angezeigt. Diesem habe ich noch einen Laufwerksbuchstaben zugewiesen. 3) Betrieb Ich habe den NAS-Server jetzt seit etwa drei Wochen im Einsatz und er funktioniert bestens. Auch die Geschwindigkeit ist topp. Ich merke keinen Unterschied, ob ich jetzt auf eine Festplatte kopiere die per USB angeschlossen ist, oder auf den NAS-Server. Das Hausnetzwerk ist übrigens ein Gigabit-Netz. Die Festplatten schalten sich nach ein einstellbaren Zeit automatisch ab und werden erst wieder aktiv, wenn darauf zugegriffen werden soll. 4) Zusammenfassung Meine Erwartungen an das Gerät wurden vollständig erfüllt. Zeitaufwand für die Einrichtung: <=60 Min. Positiv + Einfache Einrichtung ohne zusätzliche Software + Gute Geschwindigkeit + Angemessener Preis Negativ - einziger negativer Punkt: Ein Neustart dauert teilweise bis zu 3 Minuten (wird aber nur nach Stromausfall oder Update benötigt)
L**3
Ottimo prodotto
Questa è la mia seconda NAS che si affianca ad un DNS-320. Ho voluto replicare su D-Link per due motivi: basso costo, adeguate funzionalità. E' vero che sul mercato esistono NAS molto più evolute, con molte funzionalità che però nel mio caso servono poco. Il mio scopo era infatti quello di aumentare la capacità di memorizzazione utilizzando HD già in mio possesso. La scelta è stata quella di profilare il DNS-320L con un raid 1 ed accesso cloud per memorizzare files personali e foto, mentre sulla vecchia NAS DNS-320 memorizzare film e musica con DLNA in raid0 per sfruttare al massimo la capacità a discapito della ridondanza. Durante la fase di installazione non ho avuto alcun problema. Ho voluto utilizzare i due vecchi HD, con tutti i dati (che avevo però copiato su altri HD esterni per sicurezza) sulla nuova NAS e sono stati riconosciuti senza problemi mantenendo tutti i dati ( da fare solo le profilazioni per gli accessi). Viceversa inserendo due nuovi HD sulla vecchia NAS, questa ha mantenuto tutte le profilazioni proponendo solo di definire quale tipo di configurazione adottare sulle partizioni. Unica cosa persa è la lingua italiana. Direi che sono soddisfatto, il mio obiettivo è stato raggiunto da 1T di disponibilità sono passato a 3T con pochissima spesa.
M**L
Un super petit Nas de base
Je possède ce petit Nas, assez sympathique d'un point de vue design, depuis deux ans. Auparavant, j'avais essayé un nas Netgear bien plus cher et par la suite le meilleur des Synology. J'avais été rebuté par le premier à cause de sa difficulté d'utilisation et par le second par son côté fermé et les nombreux bugs que je n'avais jamais pu solutionner. Je m'étais tourné vers ce petit modèle sans en attendre grand chose. Et surprise, non seulement ce Nas est ultra simple d'utilisation, mais il est aussi robuste, fiable, rapide. Il ne m'a jamais fait défaut et contrairement aux deux autres précités, tout se fait facilement et sans problème à condition d'être patient lors de la première mise en route ou lors de la configuration du RAID 1 (copie redondante afin de ne pas perdre d'informations). Il n'y a bien sûr pour ce prix aucune fioriture sur ce modèle et très peu d'applications. Je m'en sers pour stocker mes vidéos, mes BDs, mes photos et ma musique et les diffuser sur le réseau à destination de différents terminaux (tablette, nvidia shield, smartphone, chaîne hifi-connectée). Il est configuré comme disque réseau sous windows 10 et je peux donc très facilement faire des drags & drops des fichiers que je veux y ajouter. Tout marche à la perfection. Exemple de bonne surprise : j'avais installé un premier disque dur il y a deux ans et complété par un second très récemment. La mise en place du RAID 1 s'est faite en quelques clics sans aucune perte de données! La configuration du nouveau disque (très longue, environ 2 heures pour 3 TO) et sa synchronisation ont pris pas mal de temps car il y avait beaucoup de données à copier mais c'est le Nas qui s'occupait de tout. Remarque : pour l'installation du Nas, je ne suis pas passé par le programme fourni par TPlink qui le détecte de façon aléatoire (comme tous les programmes de ce genre sur les autres marques). Je recommande de passer par l'interface du Nas directement en tapant simplement son adresse IP dans votre navigateur.
M**N
Great Value Budget NAS
I bought this NAS so I could share my content over the network to multiple network devices on my home network mainly using the DLNA server built in to the device. First thing I should say about this device is that it is a budget device and therefore you shouldn't expect lightning performace. Transferring files over a non gigabit LAN maxes out at around about 11 MB per second, which is about right. However, over wireless, this device is much slower, probably maxing out at around 2/2.5 MB per second (I've tested this from a couple of devices and using a couple of different wireless routers). Still, this is not really an issue once you have loaded up the device with files initially using a wired device you can just push the odd file across. (I've got my Galaxy S3 set up to use ES File Explorer to push and pull files to and from my phone wirelessly over the Lan) With regards to speed, the web interface is slightly laggy at time but generally gets the job done quite well. In terms of functionality, I've found it pretty damn useful. There is a built in bittorrent client, which can have a schedule set up torrent links can be pasted in to the web interface and set up to download too. The web interface allows you to turn on a web server, ftp server,Apple time capsule and DLNA server too, along with manage files and download them through the web interface too. As I said, the main reason I had for this was to stream media to multiple devices, both wireless and wired to devices such as laptops, phones an Xbox 360 and a PS3. Once the DLNA server was turned on and folders were selected to share, the device needs to index the folders. Be aware that this can take a while (a few hours for the > 1TB I have on my drive). Once this was complete, the media server showed up instantly in the video section of the XMB on the PS3 as well as Media section on the Xbox. I've had 2 drives in this so far, a Samsung Spinpoint F2 1TB and a Western Digital Caviar Green 3TB and both have worked flawlessly, were easy to insert into the device and easy to remove. This is done by screwing a small plastic handle to the top of the drive before inserting them into the device and slotting them in. The device itself feels sturdy and fairly well made with the exception of the top 'lid' which needs to be unclipped to add / remove the hard drives (but it will be used so infrequently it won't matter) The design is glossy piano black and silver which looks really nice next to my old style PS3 and the unit is generally inaudible over the PS3, though if the fan needs to spin up to maximum, it will make slightly more noise(it does this when the unit starts up), but nothing too bad (I've never had this happen in all the time I've used this product, which is over 4 months) There is also a USB 2 port on the device which allows 1 click backing up of the usb device to the NAS box, but I've never used it. Apparently, it can also be used to connect a printer to in order to share it across the network too, but again, its a feature I've never used. Overall, if you want to have a shared network drive and a cheap network media server, this is a fantastic buy. It's significantly cheaper than other products on the market but this comes at the price of speeds, both wireless as well as the the web interface. This doesn't make the product unusable, far from it, but it is something you should be aware of. I thoroughly recommend it though.
Trustpilot
1 week ago
1 day ago